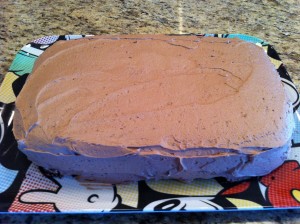
Recipe: Coca-Cola Cake

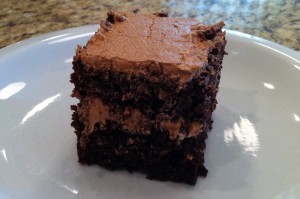
A few months ago a co-worker asked if I’d ever made a Coca-Cola cake. I was intrigued. I hadn’t ever even heard of Coca-Cola cake. He suggested that maybe I might like to try making one. (My co-workers are often suggesting I should try different recipes as they usually get the leftovers.) So, when I stumbled across this Coca-Cola cake recipe, I bookmarked it. I had actually looked at the Coke website for a recipe. Their recipes seemed too complicated for me. I’m a Betty Crocker NOT a Martha Stewart.

A few weeks ago, one of the women in my small group suggested that maybe I should make a cake for her birthday which was coming up soon. (Do you notice a theme here. People always suggesting things. Guess they know I love to cook.) I thought, “Hey! I should make that Coca-Cola Cake I found awhile back.” And, that’s just what I did.

It was a HUGE hit, both with the small group folks (Except for my one girlfriend who doesn’t like Coke. Who lives in the ATL and doesn’t like Coke?) and the co-workers.

I thought I’d share the recipe with you.

Cake:

  • 1 box Devil’s Food Cake Mix
  • 1 small box (3-4 oz) INSTANT chocolate pudding
  • 4 eggs
  • 1/2 cup oil
  • 10 oz Coca-Cola (NOT diet)

Whisk together the cake mix and pudding. Add eggs, oil and Coca-Cola and mix until combined. Pour into a greased 9×13 pan and cook at 350 for 30 minutes. Let it cool for 10 minutes before flipping it onto a cookie sheet or platter.

Icing:

  • 1/2 cup butter, softened
  • 16 oz powdered sugar
  • 2 Tbsp unsweetened cocoa powder
  • 2 tsp vanilla (recipe called for 1 1/2 – I always put more)
  • 1/8 cup Coca-Cola
  • 1/4 tsp salt

Beat butter on low speed with mixer. Slowly add the powdered sugar. Add remaining ingredients and beat until smooth.

You can cut the cake in half and ice as a layered cake. (That’s what I did.) Or, you can just ice the cake.

It was REALLY good! So good that people who ate it at the office when I wasn’t there even emailed and called me to tell me how good it was. I’m thinking they want me to make that one again.

If you want to go a little crazy, the author of the original post even lists several other soda and cake mix combinations that might be yummy.

Do you use Coca-Cola (or any other sodas) in one of your recipes?

Recipe : Southwestern Casserole

Southwestern Casserole is a Tasefully Simple recipe that I found forever ago when I was a Tastefully Simple consultant. I’ve tweaked it a bit over the years until I landed on this variation. It does call for Tastefully Simple Corn, Black Bean Salsa, which you have to purchase from a consultant. I’m sure there are other corn and black bean salsas out there that you could substitute. I’ve just never found one I like as much as this one.

All that being said, here’s the recipe…

Ingredients:

  • 1 jar Corn, Black Bean Salsa (I use Tastefully Simple)
  • 1 cup sour cream
  • 2 cups cooked chicken
  • 8 ounces of pasta, prepared
  • 1.5 cups shredded cheese (I usually mix cheddar and colby jack)

Mix the salsa, sour cream, chicken and pasta in a large bowl.

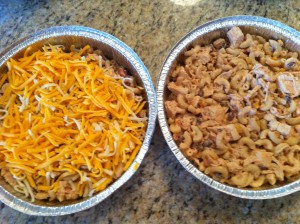
Place in a casserole dish. (I usually split it into two small dishes for my smaller family.)

Sprinkle with cheese.

Bake at 350 for 30 minutes.

This dish freezes BEAUTIFULLY. Just cover after you sprinkle the cheese and freeze.


I once had a friend say it tastes like a “pasta burrito.” It’s SO easy to make and a great one to deliver to friends with a side salad and some rolls.

7-Layer Taco Dip

When we moved from our old neighborhood, my amazing friends had a party for us where they made their favorite recipes and then gave me a recipe book with all those recipes inside. They also signed the inside of the recipe book with loving notes. Do they know me or what!? How sweet – right?

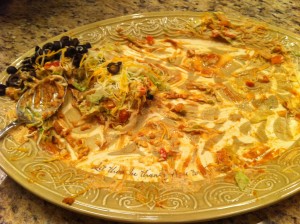
Tonight I opened up my recipe book to make something for Small Group. I would say it was a success. This is what the plate looked like after the group left.

I totally forgot to get a before picture. But, you get the idea. It was good. Like, really good. And, it was quick and easy to make. My favorite type of recipe for Small Group night.

7-Layer Taco Dip

  • 1 can refried beans (I used the regular sized one)
  • 16 oz carton sour cream
  • 1 pkg taco seasoning
  • 1 jar salsa
  • Guacamole (I used a small container from the produce section.)
  • 1 small can sliced olives
  • Shredded lettuce (I used 3/4 a pre-shredded bag.)
  • Shredded Mexican blend cheese (I used about 1.5 cups, but I like LOTS of cheese.)

Mix the sour cream and taco seasoning together in a small bowl. Assemble your ingredients and then layer them in a 9×9 pan or a lovely platter in the following order.

  • Refried beans
  • Guacamole
  • Sour cream mixture
  • Salsa
  • Shredded lettuce
  • Cheese
  • Olives

Refrigerate for at least an hour to let the flavors blend. Serve with tortilla chips or Fritos. I served with the “scoop” form of both.

Ya, it was yummy. I shall be making it again. I really liked serving it on the platter. It made the layers thinner so it was easier for us to all stand around and just scoop off the platter while we chatted. Oh, not that we did that, because that would be rude. We TOTALLY all served ourselves some on individual plates…right, that’s what we did.

Do you have a favorite recipe that an amazing neighbor/friend has shared with you?

Mandarin Chicken Salad

Chicken Mandarin Salad

  • 3 cups diced, cooked chicken (I like to cook one in the crock pot or buy a rotisserie.)
  • 1 cup diced celery
  • 2 Tbsp lemon juice
  • 1 Tbsp minced onion (I use Tastefully Simple Onion Onion.)
  • 1/2 tsp salt
  • 1/3 cup mayonnaise
  • 1 cup seedless grapes (I chop mine in fourths.)
  • 11 oz can drained Mandarin oranges
  • 2 oz pkg slivered almonds – toasted

Combine chicken, celery, lemon juice, onion, and salt.

Chill for several hours or over night.

Right before serving, add mayonnaise, grapes, oranges, and toasted almonds.

I typically serve this AMAZING chicken salad with mini-croissants. SO GOOD! Great meal for a warm summer day!


Summer is Here!! What to eat?

Nothing says summer like an ice cream cone. Mmmmmm… However, one cannot live by ice cream alone. Well, I guess you could, but I don’t think you would feel really good after awhile.

However, there are certain summer foods that we all LOVE to eat. I thought I’d start gathering some for you. Fun – right!

House of Hills:

Other Blogs:

How’s that for a start? I’ll keep adding as the summer goes on. I’m sure to come across some more yummy stuff.

Have you found some great summer recipes? Do you have one of your own?

Things I Love Thursday: The Slow Cooker

This is on my counter right now. It’s making dinner for me. I love that it makes dinner for me. It makes dinner for me often.

I cook all kinds of things in the slow cooker – roasts, ribs, bbq, chicken, mac n cheese, green beans, applesauce, cider

Oh, and I don’t have just one slow cooker. Nope, I have THREE! And yes, they have all been going at one time.

I thought I’d share a family favorite that I am asked to make every year for Thanksgiving.

Slow Cooker Green Beans

  • 2 lbs fresh green beans (ends snapped off) – I cut them into smaller pieces for easier eating
  • Salt
  • 1/4 lb ham cut into chunks – I get a slab fresh from the deli and cut it up – yummy
  • Water

Put half the beans into a 4.5 quart slow cooker. Sprinkle with salt and half the ham. Add the remaining beans, another sprinkle of salt and remaining ham. If I am preparing ahead of time, I put the dish in the fridge at this point until the next morning. Add enough water to cover beans (about 3 to 4 cups). Cook for 10 to 12 hours on low.

That’s right, you cook them for 10 to 12 hours. They really taste best after 12 hours. Now, that takes some planning. For Thanksgiving, I prepare the beans the night before and set the alarm for 5am. At 5, I stumble into the kitchen, add the water, turn on the slow cooker and stumble back to bed for another few hours. It’s worth the few minutes of interrupted sleep. Believe me.

What is your favorite thing to cook in your slow cooker?
How many do you have?
I love my slow cooker! Do you?

Linked to Things I Love Thursday

Crescent Rolls for the Holidays

I was contacted by My Get Together to host a Pillsbury Crescents “Holiday Entertaining” Recipe Swap. I was excited to host this gathering since I LOVE Pillsbury in general… and crescent rolls..YES PLEASE! We all know crescent rolls are great by themselves, but there are so many other things you can do with them. In fact, there is an entire section of the Pillsbury website devoted to them. There are some FABULOUS recipes on there.

The folks at My Get Together were kind enough to send me four recipes to try, and the guests at my Birthday Party LOVED them. Here is what we tried…

PIGLETS IN THE BLANKET

These are the traditional tiny hot dogs wrapped in crescent rolls and baked. They were the first treat to go and the favorite of the younger set. You just can’t go wrong with these. However, typically when I make these I make them with Grands Flaky Layer Biscuits. I like them better for some reason.


CRESCENT WRAPPED BRIE

So, I LOVE brie. Like REALLY LOVE brie. It’s my favorite savory treat. This was so easy to do and looked so elegant. The website even has a tutorial on how to wrap it. This will be a hit at your next gathering for sure.


BACON-CHEDDAR PINWHEELS

These were a real hit. They were a recipe that nobody at the party had tried before, and were very good. They are so easy to make and VERY yummy to eat.


CRESCENT LAYER BARS

Oh.My.Word! These were SO GOOD. Like sinfully so. Amazingly easy to make, and hard to resist, these were the most popular recipe on the table. I took the rest to work today, and they disappeared quickly. One thing I did a little different was to use parchment paper so they were easier to get out of the pan.

If you have a holiday gathering coming up, I can highly recommend all of these recipes!

Disclosure: Pillsbury Crescents provided me with products and information through MyGetTogether. All opinions are all my own.

Pumpkin Dip


It’s fall ya’ll!! Well, the calendar says it’s fall. The temperatures in the ATL currently are not supporting that fact. However, we must move on. It is time for pumpkin. We must enjoy the pumpkin in the fall!

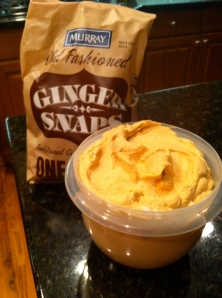
One of my favorite ways to enjoy the pumpkin – PUMPKIN DIP. That’s right. I said PUMPKIN DIP. Now, maybe you’ve heard of pumpkin dip. If you have, you are in the minority. I am always amazed by how many people are shocked and amazed by the delectable treat. And, a TREAT it is. I’ve been known to just stand by the bowl and just dip, dip, dip.

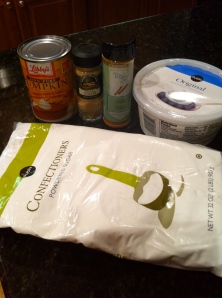
You need some pumpkin (duh!), an 8oz cool whip, ginger, cinnamon, and powdered sugar.

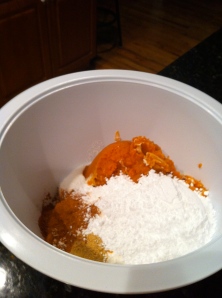
Dump it all in a bowl and whisk away until it’s all combined.

That’s it. You’re done. Seriously, could it be any easier?

Pumpkin dip is best if it is made at least twelve hours before it’s served. Twenty-four hours is even better. The longer it sits, the better the flavors blend. Mmmmm… so yummy.

I serve my pumpkin dip with ginger snap cookies. I’ve also seen it served with tart apples. I plan to offer both at my next gathering.

PUMPKIN DIP RECIPE

  • 8 oz cool whip
  • 15 oz can of pumpkin
  • 1 tsp ginger
  • 2 tsp cinnamon
  • 1 cup powdered sugar (more or less can be used according to taste)
  • Whisk all the ingredients together in a medium bowl.  Chill until time to serve.

Pumpkin Dip – I LOVE IT!

Linked to Things I Love Thursday

Linked to Works For Me Wednesday

German Apple Cake

We had a serious amount of apple goodness going on in the House of Hills this past week. The Princess and I went apple picking last Saturday and came home with a *ahem* few apples to use. One of the things I knew I wanted to make was this German Apple Cake. I found this recipe two years ago during Johnny Appleseed week when the Princess was in first grade. I needed something easy to send in for the kiddies.

Over the last two years, the recipe has evolved as I’ve made it for the office, for small group, for friends and neighbors, for LOTS of folks. The BEST part about this recipe is that it FREEZES BEAUTIFULLY!

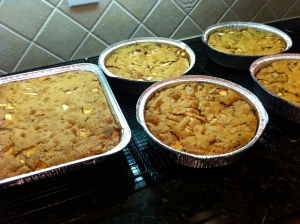
With the massive amount of apples I had on hand, I decided to triple the recipe. I made one batch in a 9×13 pan to take to the office and split the other batches into two smaller pans each. That allowed me to have more in the freezer to share.


I cut my apples (I don’t peel them.) and combined my dry ingredients in three separate batches. I’ve learned that in order to keep the distribution of the apple chunks even, it’s better to mix each batch as it’s own.

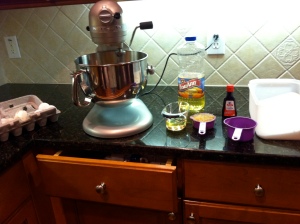
I set up my wet ingredients (and sugar) next to the stand mixer. The original recipe called for one cup of oil, but I split that into 1/2 cup of oil and 1/2 cup of the Crock Pot Applesauce that had just finished cooking and was filling my kitchen with the most amazing smells.

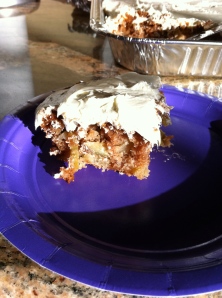
When I was finished, I had five very lovely apple cakes to share. I iced the 9×13 with cream cheese frosting (from the tub – I know terrible) to take to work the next day. I covered and froze the rest.

I delivered food to a friend today and brought a tub of cream cheese frosting with me. When she saw the tub, her eyes lit up and she said, “Does that mean there’s apple cake! Don’t put that in the freezer.” I told you. It’s good stuff.

GERMAN APPLE CAKE
2 eggs
1/2 cup vegetable oil
1/2 cup applesauce
2 cups white sugar
2 teaspoons ground cinnamon
1/2 teaspoon salt
1 teaspoon vanilla extract
1 cup unbleached flour
1 cup wheat flour
1 teaspoon baking soda
4 cups apples

1. Preheat oven to 350 degrees. Grease and flour one 9×13 pan or two smaller pans.
2. In a mixing bowl, beat oil, applesauce and eggs with an electric mixer until creamy.
Add the sugar and vanilla and beat well.
3. Combine the flour, salt, baking soda, and ground cinnamon together in
a bowl. Slowly add this mixture to the egg mixture and mix until
combined. The batter will be very thick. Fold in the apples by hand
using a wooden spoon. Spread batter into the prepared pan.
4. Bake at 350 degrees for 45 minutes or until cake tests done.
5. Let cake cool on a wire rack. Once the cake is cool, serve it with a dusting of confectioners’ sugar or with a Cream Cheese Frosting.

Crockpot Applesauce

The Princess and I went apple picking last weekend. We not only had a great time picking the apples, we also got a great deal on huge bags of apples from their store. While I was there, I texted with my mom to see if she wanted some apples to make applesauce. She did and told me EXACTLY which types to get as instructed by her cousin Hazel. (Hazel has lived on a farm for like her entire life, and I totally trust her for all things homemade.) So, when I got home, I went looking for an EASY applesauce recipe. I mean I needed it to be EASY since I don’t have any special apple cutting, mashing, straining equipment.

I quickly found a recipe for Crock Pot Applesauce from FishMama. She never disappoints. It literally was apples, water, and optional sugar. That worked for me.

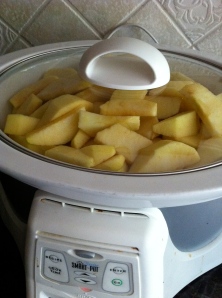
The recipe calls for 16 apples. I used 8 GOLDEN DELICIOUS 8 STAYMAN WINESAP apples. I used my Pampered Chef corer to core and cut each apple. Then I pealed each piece. Could I have done this another way? I’m sure I could have, but this worked for me. I was watching football while I was peeling, so it went quick.

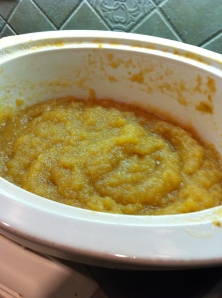
I then put all the apples in the crockpot with 1/4 cup of water and let them cook on high for 4 hours. At hour 3, they started to bubble a bit, so I took a fork and mixed them. They were already falling apart. By hour 4, they were total mush. I didn’t even have to mash. I literally just mixed the entire pot with a fork.

Then, I had to decide if I wanted to add sugar. So, I took a taste. OH. MY. WORD. It was SO GOOD. Like, I spooned out a bowl and ate it right then. It didn’t need anything – no sugar – no cinnamon. It was pure God made goodness.

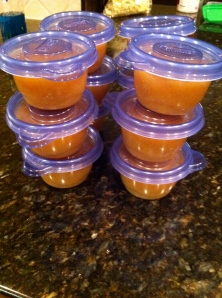
Now, what’s really funny is…nobody but me eats applesauce in our house. And, I don’t eat it that much. So why in the world would I spend time peeling all those apples and making homemade applesauce? Because I bake with it. A LOT! When a recipe calls for oil, I use half oil and half applesauce. Typically, I need 1/2 cup of applesauce for a recipe. So, I buy applesauce in those cute little cups. That can get pricey, and this homemade applesauce is WAY better than any store-bought applesauce. All the applesauce I made this week (2 batches) went into cute little 1/2 cup containers and put in the freezer.

Well, except for the couple bowls I had to eat. I’m telling you – it’s delicious. I might have to go get one right now.